1. Learn Maven3 first.
This is quite simple. Go through Maven in 5 Minutes
That’s quite enough.
2. Set up project
Using the command in Maven in 5 Minutes to create a project using your own groupId and artifactId.
mvn archetype:generate -DgroupId=com.ahchoo.automation -DartifactId=ahcoo -DarchetypeArtifactId=maven-archetype-quickstart -DinteractiveMode=false
Change the pom.xml to add Junit and WebDriver dependencies
<project>
…
    <dependencies>
        <dependency>
            <groupId>junit</groupId>
            <artifactId>junit</artifactId>
            <version>4.10</version>
            <scope>test</scope>
        </dependency>
        <dependency>
            <groupId>org.seleniumhq.selenium</groupId>
            <artifactId>selenium-java</artifactId>
            <version>2.20.0</version>
            </dependency>
            </dependencies></scope></version></artifactId></groupId>
        </dependency>
    </dependencies>
…
</project>
Then run
mvn clean install3. Using eclipse to import this project
install m2eclipse and
run command in the project root directory:
mvn eclipse:clean
mvn eclipse:eclipse
open eclise, click File and choose Import:

Choose Existing Projects into Workspace

After import, you will see the file tree in eclipse project explorer:
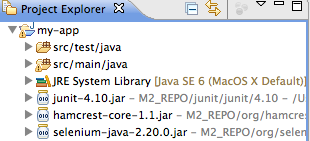
Thus the environment is set up.